With the rise in Social Media Marketing, many of my customers have been asking about the best way to add those icons to their GoldMine e-mail signature templates. Having seen a rising use of “attaching” of icons, we figured it was time to show the best way to add icons the right way. Who wants to keep getting e-mails with a half-dozen attachments per e-mail??
First, let’s start with the basics. First, how to create GoldMine E-Mail Templates… we already have a blog post on how to do that:
Using E-Mail Templates
Second, how to insert HTML images in E-Mail Templates:
HTML Images in E-Mail Templates
With that foundation, here’s how to take that skill and apply it to Social Media Icons.
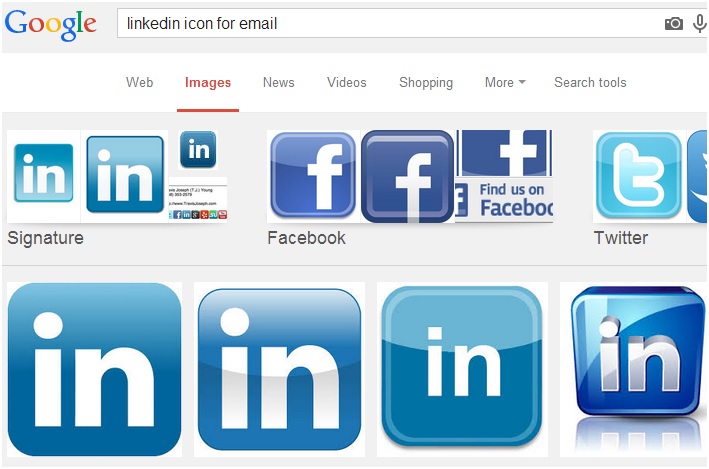
- Find your icons. A Google Search for “linkedin icon for email” will give you a whole page of images. Just find your favorite. Make sure it’s the right size.
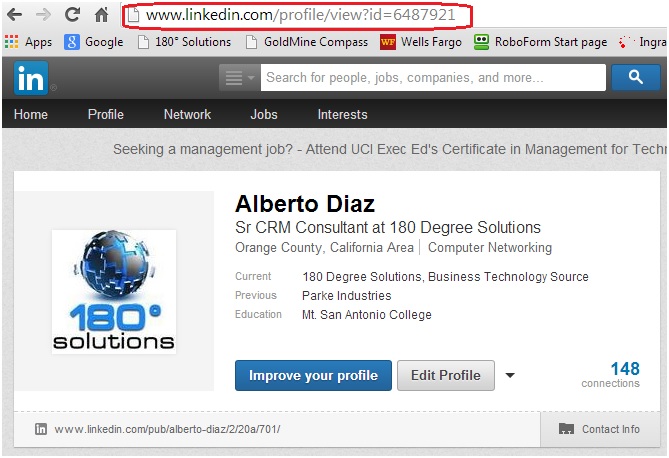
- Save the image to your PC and e-mail it off to your web team, requesting they e-mail you back a link to that image on your website. This should be a rather common request and they should know what to do.
- Once you get the link back, going back to the HTML Images in E-mail Templates blog post, use that link to insert the icon in your e-mail template.
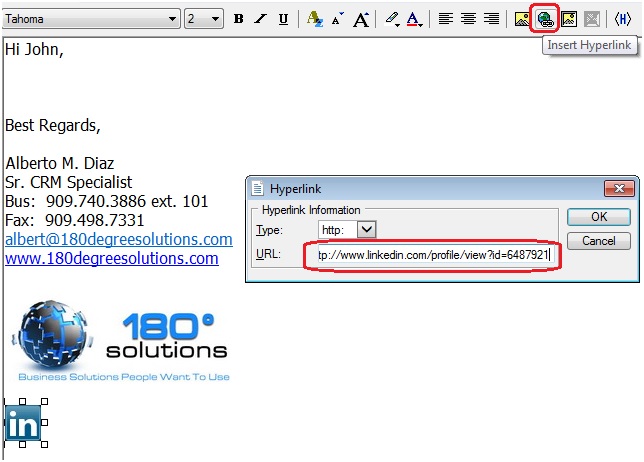
- Now log into your Social Media account and copy the link address to your page so recipients can simply click on the icon and get taken to your page.
- Go back to your e-mail template in GoldMine, right-click on the icon and click the “Insert Hyperlink” button, and paste in the address.
- Now repeat for all the other icons as needed.
- Last but not least, test, test, and test before going live with the new template.
Lastly, if don’t know how to use it as a default signature file in GoldMine for all your new e-mails? Well, we have that one too:
Setting Up Different E-Mail Templates
Hope you find this of value!
Enjoy and Happy GoldMining!!